Creating Training Targets
In this step, we will prepare the target data necessary for training our model and predicting the coordinates of proteins within a tomogram.
We will use Copick to manage the filesystem, extract runIDs, and create spherical targets corresponding to the locations of proteins. Key tasks include:
-
Generating Targets: For each tomogram, we extract particle coordinates and generate spherical targets based on these coordinates, and save the target data in OME Zarr format.
-
Target dimensions are determined with an associated tomogram, (specified by the
--tomo-uriparameter, e.g.wbp@10.0). -
Additional segmentations like organelles and membranes can be included as continuous targets by passing their name via
--target— whether a name refers to particle picks or a continuous segmentation is auto-detected from the CoPick config, so no separate flag is needed.
The segmentations are saved under the query specified by the --target-uri flag (name:user_id/session_id).
URI Formats
Octopi commands identify tomograms, segmentations, and picks with short URI strings instead of separate flags for each part.
| Resource | Format | Example | Used by |
|---|---|---|---|
| Tomogram | algorithm@voxel_size |
wbp@10.0 |
--tomo-uri — repeatable for multi-source training (train/model-explore only): mix voxel sizes and/or reconstruction algorithms, e.g. --tomo-uri wbp@10.0 --tomo-uri denoised@10.0 |
| Segmentation | name:user_id/session_id |
predict:octopi/1 |
--seg-uri, --target-uri |
| Picks / targets | name:user_id/session_id |
ribosome:manual/1 |
--target (accepts either a pick set or a continuous segmentation for create-targets, auto-detected), --picks-uri |
Everything after name is optional — name, name:user_id, and name:user_id/session_id are all valid, and the legacy comma form name,user_id,session_id still works. Repeat a flag (e.g. --target ribosome:manual/1 --target virus-like-particle:tm/2) to pass multiple URIs of the same type.
octopi localize is the one exception — since it writes new picks rather than reading an existing pick set, its output is specified with separate --pick-user-id/--pick-session-id flags instead of a combined URI.
Method 1: Automated Query
The simplest approach is to let Octopi automatically find all pickable objects from a specific annotation source.
When to Use
- ✅ Single annotation source: All picks come from one user/session
- ✅ Quick setup: Minimal parameter specification
Example Command
octopi create-targets \
    --config config.json \
    --picks-user-id data-portal --picks-session-id 0 \
    --tomo-uri wbp@10.0 \
    --target-uri targets:octopi/1
This command automatically finds every pickable object in the config and queries data-portal/0 for it — particle picks and continuous segmentations (like membrane) alike, since the type is auto-detected per object. If a particular object's annotations live under a different user/session than the rest (e.g. a membrane segmentation from a separate tool), list objects explicitly with --target instead (Method 2).
Method 2: Manual Specification
For more control, manually specify which protein types and annotation sources to include. Users can define a subset of pickable objects (from the CoPick configuration file) by specifying the name, and optionally the userID and sessionID. This allows for creating customizable training targets from varying submission sources.
When to Use
- ✅ Multiple annotation sources: Combining picks from different tools/users
- ✅ Selective training: Only specific protein types needed
- ✅ Quality control: Excluding low-quality annotations
Advanced Command
octopi create-targets \
    --config config.json \
    --target apoferritin --target beta-galactosidase:slabpick/1 \
    --target ribosome:pytom/0 --target virus-like-particle:pytom/0 \
    --target membrane:membrane-seg/1 \
    --tomo-uri wbp@10.0 \
    --target-uri targets:octopi/1
membrane here is a continuous segmentation rather than a particle pick set, but no separate flag is needed — Octopi looks it up in the CoPick config and detects its type automatically. Labels are assigned in the order the --target flags are given, so this mixed list keeps its true relative order.
Target Specification Formats
--target accepts the same query grammar regardless of whether it names a particle pick set or a continuous segmentation:
| Format | Description | Example |
|---|---|---|
protein_name |
Use default user/session from config | apoferritin |
protein_name:user_id/session_id |
Specify source explicitly (preferred) | ribosome:pytom/0 |
protein_name,user_id,session_id |
Legacy comma form (still supported) | ribosome,pytom,0 |
Check Target Quality
To validate your training targets, refer to our interactive notebook: Inspect Segmentation Targets
This notebook shows how to load segmentation targets and overlay targets on tomograms.
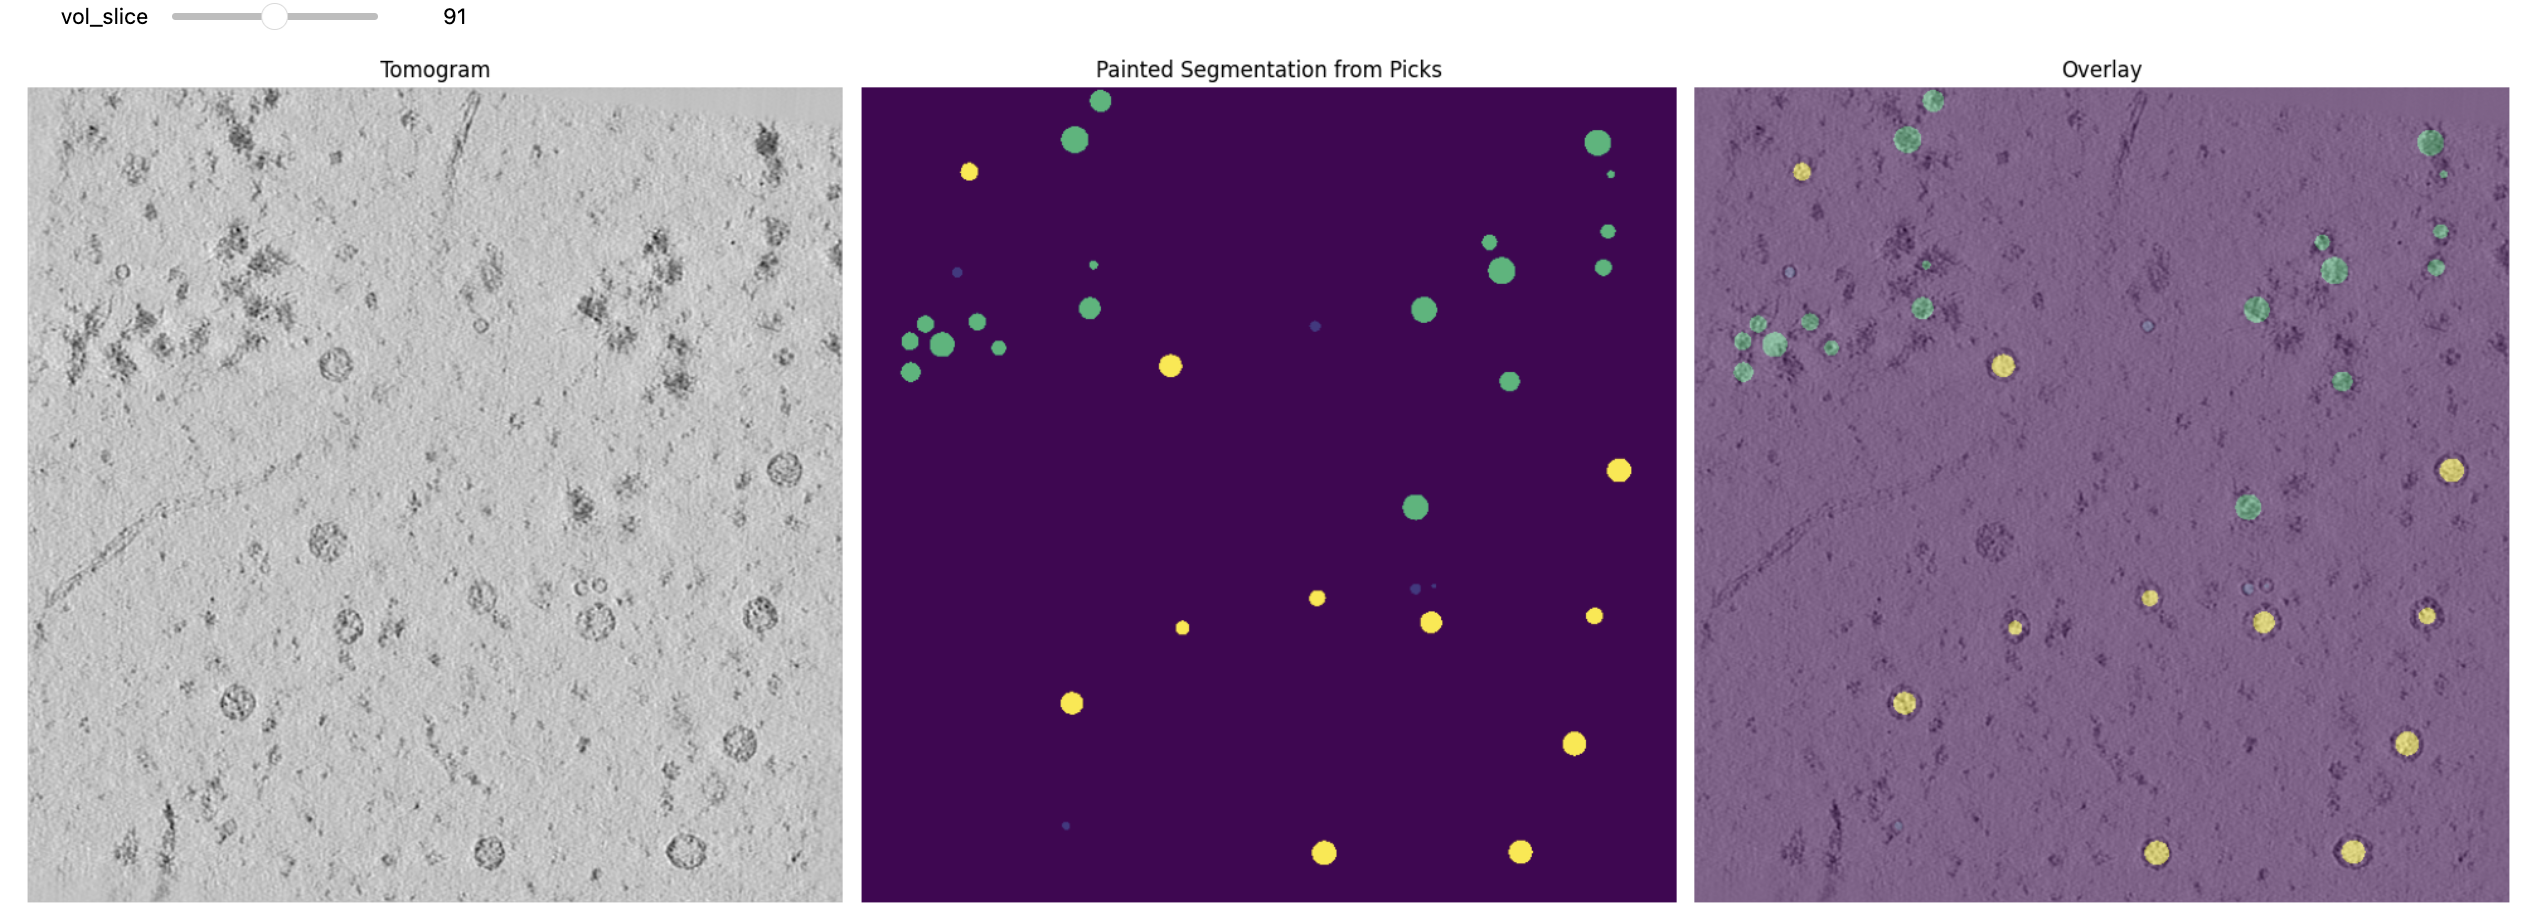 Example of training targets overlaid on tomogram slices. Different colors represent different protein classes.
Command Reference: octopi create-targets
Input Arguments
| Parameter | Description | Example | Required |
|---|---|---|---|
--config |
Path to CoPick configuration file | config.json |
✅ |
--target |
Target object(s), repeatable: "name" or "name:user_id/session_id". Particle pick set vs. continuous segmentation is auto-detected from the config; labels follow flag order | ribosome:pytom/0 |
* |
--picks-session-id |
Session ID for automated pick retrieval | 0 |
* |
--picks-user-id |
User ID for automated pick retrieval | data-portal |
* |
--run-ids |
Specific run IDs to process | run_001,run_002 |
❌ |
*Either --target OR both --picks-session-id and --picks-user-id must be specified.
Processing Parameters
| Parameter | Description | Default | Example |
|---|---|---|---|
--tomo-uri |
Tomogram URI in the form alg@voxel_size |
wbp@10.0 |
denoised@10.0 |
--radius-scale |
Scale factor for object radius | 0.7 |
0.8 (80% of original radius) |
Output Arguments
| Parameter | Description | Default | Example |
|---|---|---|---|
--target-uri |
Output query as name, name:user_id, or name:user_id/session_id |
targets:octopi/1 |
my_targets:my_experiment/1 |